When my first kid was born, my wife and I wanted a convenient, cheap, but externally accessible way to monitor our daughter. Thus,
the usual baby monitors wouldn't do the trick. We ended up getting a really handy and super cheap
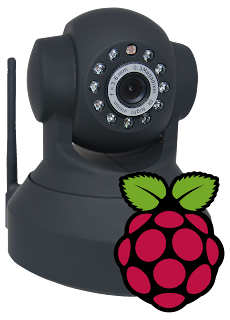
Foscam FI8910W IP Camera.
Everything about it is pretty great … except security. For that reason, I never poked a hole through my firewall so that friends
and family could peek in on Piper from time to time. I could always access the camera over VPN, but nobody else could ('cause I'm stingy
with my network access).
When I found out I had another one on the way, I decided that not only did I need another camera, but I needed a more convenient way to
securely access my cameras from outside my house. I decided I to pick up a Raspberry Pi and
expose an https endpoint that could reverse proxy requests to my ip camera. This way, I have a secure connection into my house. It's
still plain text between the camera and the pi, but that's inside my network and I'm less concerned about it there.
In any case, I picked up a
Raspberry Pi Starter Kit
which I recommend for your first pi. It'll come with the components you'll need to get set up. The second time I did this (for the sake
of recording the steps to write this blog, I just formatted my own noobs card and I used the wifi dongle from the previous pi kit.
I tried to install noobs lite on an 8gb microsd card I got from the Raspberry Pi Downloads
page, but noobs lite didn't work with the wifi dongle so I recommend plain old noobs. For the second time around, I just downloaded Raspbian
and used dd to image the microsd. Again, I recommend noobs (and I recommend the
starter kit) unless you feel pretty comfortable with command line utilities. If you are, use the
instructions for installing operating system images
from the raspberry pi site.
Pi
That being said, with noobs, you just format your micro SD card with FAT and copy the contents of the noobs zip to the sd card root. Put
the SD card in the pi, connect the mouse and keyboard, connect ethernet or the wifi dongle, connect some video output, etc. Then, plug in
the device.
The first thing to do is get connected to wifi. It's easier to do in the GUI so run startx, configure your wifi network, and
log out.
Enable SSH in sudo raspi-config.
Using SSH to administer a box is kind of a pain without tmux so get that. Also, vim is awesome so get that too. Finally, we're going to
be using nginx as our reverse proxy so install that as well.
sudo apt-get update && sudo apt-get install tmux vim nginx
To make SSH even easier,
scp your public key to your pi's ~/.ssh folder and
cat it into authorized_keys.
If you are using wifi, you'll find that wifi is disable after rebooting until the dongle is removed and re-inserted. You can change this
behavior by executing
sudo vim /etc/network/interfaces
and changing
iface wlan0 inet manual
wpa-roam /etc/wpa_supplicant/wpa_supplicant.conf
to
auto wlan0
iface wlan0 inet dhcp
wpa-conf /etc/wpa_supplicant/wpa_supplicant.conf
You'll want nginx to start automatically on reboot too probably so execute
sudo update-rc.d nginx defaults
Router
Give your pi a static ip address. My router lets me map static ips to mac addresses. DD-WRT lets you do that too. If you can't with your
router, configure a static ip address following the
Debian Network Configuration Instructions.
Give your router a static ip as well.
Forward port 443 (the default SSL port) to 443 on the pi's IP address
Get a dynamic DNS account that's supported by your router. If your router doesn't do dynamic DNS (and you can't install a decent firmware
that does, you can use ddclient on your pi instead.
Domain
You'll need a domain name that you own to get an SSL certificate. Register one.
In your domain's DNS configuration, create a subdomain with a CNAME record pointing to your dynamic DNS domain.
SSL
Get your SSL certificate from Start SSL (the free certificate will be fine). You'll have to
validate your domain. The process is pretty straightforward.
Download your certificate, key, and the intermediate certificates and make a unified certificate:
wget http://www.startssl.com/certs/ca.pem
wget http://www.startssl.com/certs/sub.class1.server.ca.pem
cat ssl.crt sub.class1.server.ca.pem ca.pem > ssl-unified.crt
SCP the key and the unified certificate to the pi's /etc/nginx folder (I like putting my certs in a subfolder)
Configure nginx
Create a configuration file called /etc/nginx/sites-available/ipcams
server {
  listen 80;

  server_name your.domain.com;
  server_name your.pi.ip.address;

  return 301 https://$host$request_uri;
}

server {
  listen 443 ssl;

  ssl_certificate /etc/nginx/certs/ssl-unified.crt;
  ssl_certificate_key /etc/nginx/certs/ssl.key;

  server_name your.domain.com;
  server_name your.pi.ip.address;

  location /front_porch/ {
    proxy_pass http://your.porch_cam.ip.address:80/;
  }

  location /baby_room/ {
    proxy_pass http://your.baby_cam.ip.address:80/;
  }
}
Remove the default symlink from /etc/nginx/sites-enabled and add new symlink
cd /etc/nginx/sites-enabled
sudo ln -s ../sites-available/ipcams ./ipcams
Restart nginx:
sudo service nginx restart
Summary
So, now https requests to your subdomain are resolved by your dynamic DNS to point to your IP where your Pi is. Your Pi gets an https
request and forwards it inside your well protected network (in plain text) to your camera. I keep my Pi wired to cut back on the
wireless traffic that happens in plain text. In any case, this way you can get from outside your house to inside your house over an
encrypted ssl connection.